Install our AFL UTM Tracker plugin to easily capture UTM parameters for your Gravity Forms submissions.
This article outlines the steps for you to verify that your next Gravity Forms Entry comes attached with our Conversion Attribution Report that tells you the following information:
- Conversion Lag time
- First Landing Page URL
- First Website Referrer
- First Touch UTM parameters
- Last Touch UTM parameters
- Click Identifiers (gclid, fbclid, msclkid)
Minimum Required Plugins
- AFL UTM Tracker v2.9.0
- Gravity Forms v5.7.1
Steps
Once you have installed and activated our WordPress plugin, UTM conversion tracking is automatically enabled on your website for all of your Gravity Forms.
- To set the default setting for all forms, go to the Gravity Forms > Settings > AFL UTM Tracker page.
- To change a setting of a particular form, go to the Gravity Forms > Forms > Select a Form > Settings > AFL UTM Tracker.
- That’s all! Run the test below.
How to test your form?
- Use the Google’s Campaign URL Builder to generate a campaign URL to a page where your form was embedded.
- Open your campaign URL in the Incognito/Private Browser mode to simulate a new website visitor.
- Fill and submit the Gravity Form on your website.
- Check the Conversion Attribution Report in your Gravity Forms admin.
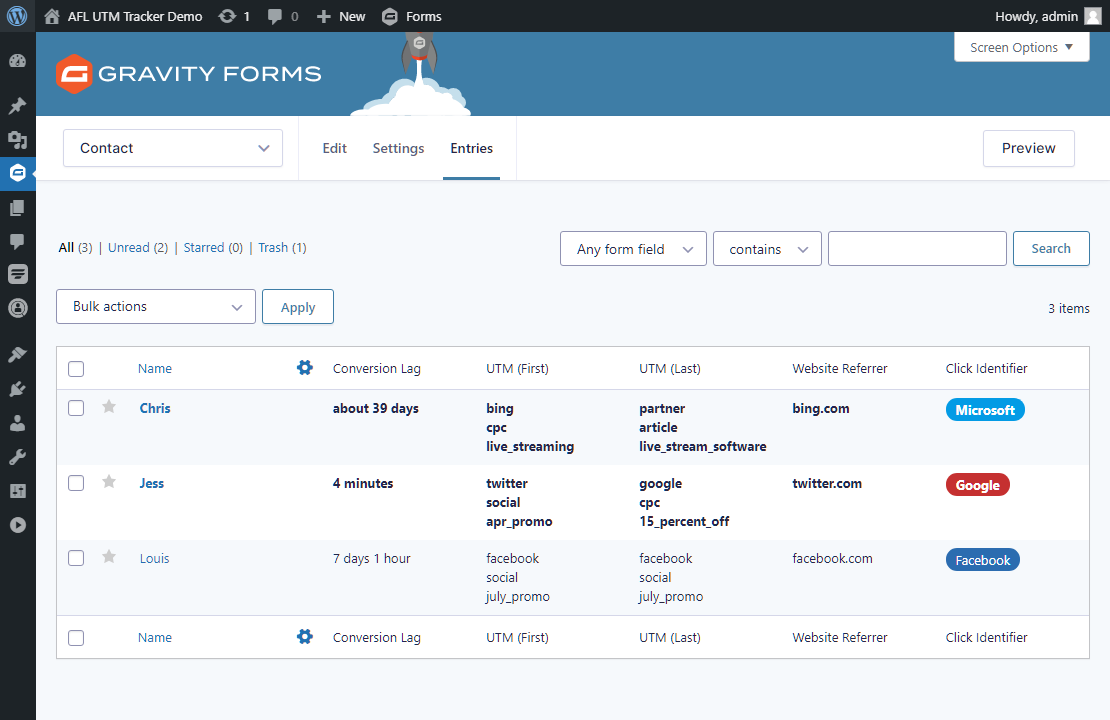
Viewing the Conversion Attribution Summary
- Go to your (Gravity Forms menu > Entries) page.
- Here you will get a quick summary of each individual entry.
Viewing the Conversion Attribution Report
- Click into an individual Gravity Forms submission entry.
- Here you will be able to view the full conversion attribution report.
