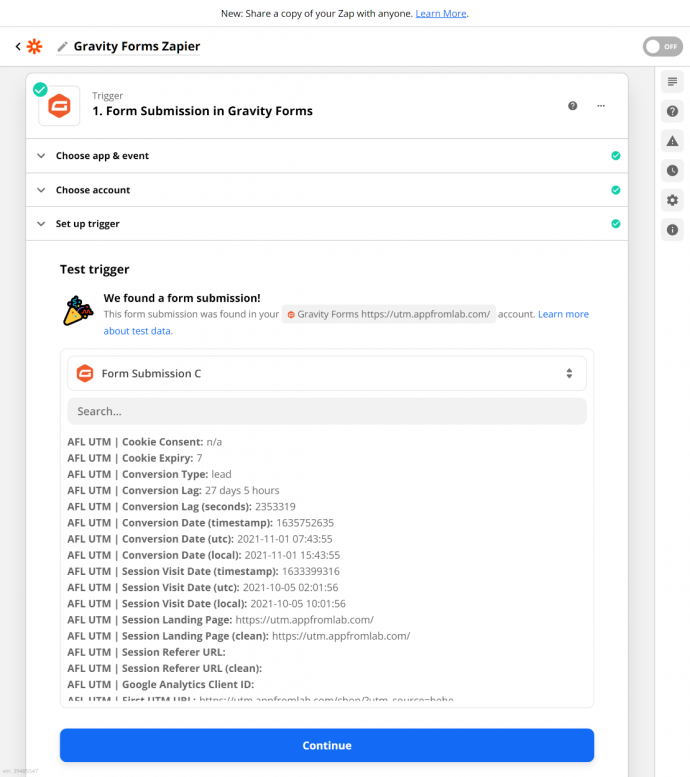
You will be able to send the captured UTM parameters from your Gravity Forms entries to Zapier using our AFL UTM Tracker plugin and the Gravity Forms Zapier Add-on.
For a full list of conversion attribution values which you can access, please view our Attribution Meta List.
Requirement / Compatibility:
- Gravity Forms Zapier Add-on version 4.1.1 or higher.
- Gravity Forms Zapier Add-on version 3.3 (Legacy).
Known Issues:
- Gravity Forms Zapier Add-on version 4.0.0 and 4.1.0 do not work. Download the latest version 4.1.1 or higher.
NOTE: Some version may require you to download the add-on from the Gravity Forms official website.
Gravity Forms Zapier Add-on (4.1.1 or higher)
If you have an existing Zap, skip to step 11 and run the Test Trigger again to pull in the new data structure.
- Follow the initial setup steps from the Gravity Forms website.
- On the Zapier’s website, create a new Zap.
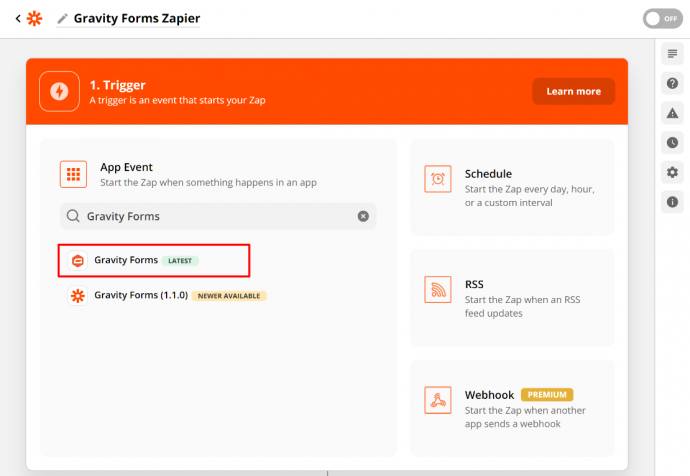
- Search for Gravity Forms.
- Select the Gravity Forms (Latest).
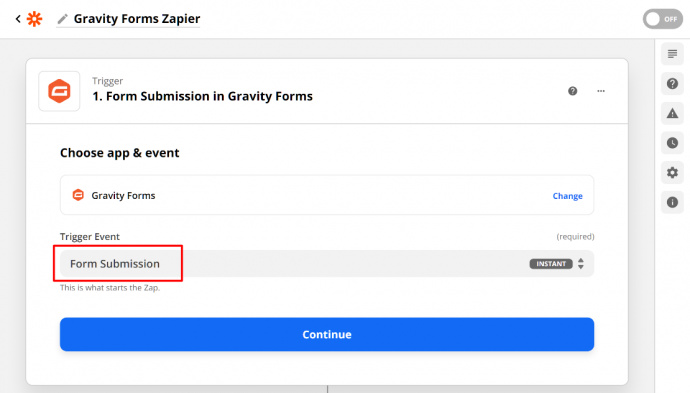
- For the Trigger Event, select Form Submission.
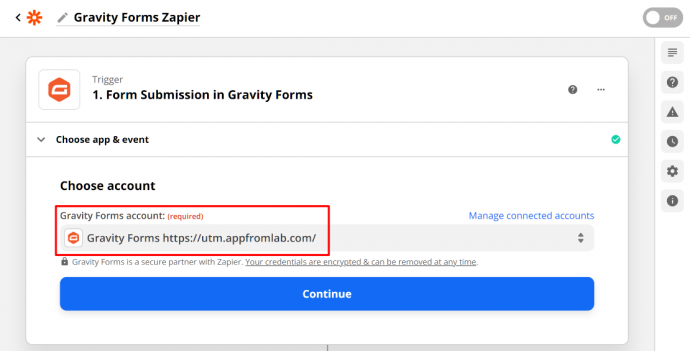
- For the Gravity Forms Account, select the right connected account / website.
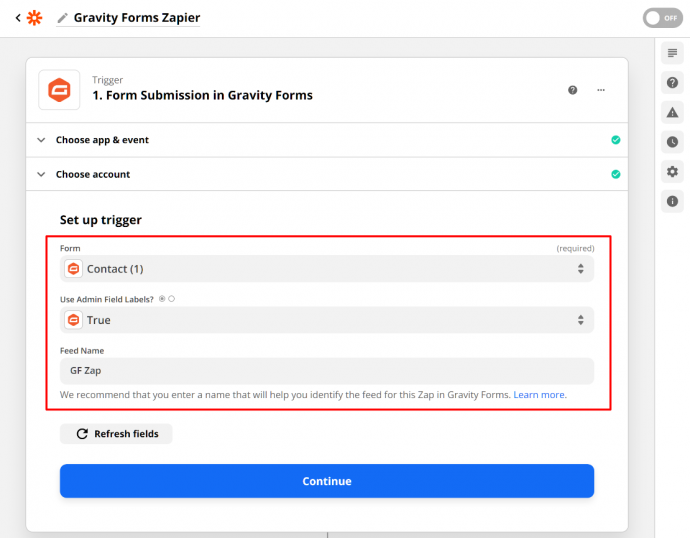
- For the Set up Trigger, select the form which you would like to receive data.
- For the Use Admin Field Labels, set to True if you are using it in your form.
- For the Feed name, type in an appropriate name.
- Continue.
- Go to your website and submit the form.
- On the Zapier’s website, click on the Test Trigger to receive the data.
- If the data has not arrived, retry or click on the Form Submission A / B / C dropdown and click on Load more.
- Continue.
- Create a new Action to connect to any Zapier apps like Google Sheets.
- Now you can map the conversion attribution data from your form submissions.
