You can pass the dynamic UTM parameters to the Calendly Embed Widget using our AFL UTM Tracker plugin.
Requirements
- AFL UTM Tracker version 2.18.0 or higher.
- WordPress 5.0.0 or higher.
Steps
- In your WordPress Post / Page, add a Custom HTML block.
- Copy and paste our custom code snippet below into the Custom HTML block.
- Save and preview your post.
- Submit a test appointment.
Code Snippet
- On Line 13, change the my_calendly_url variable value to your own Calendly URL.
- On Line 1, change the CSS style to fit your page layout.
Make a test Calendly Appointment
- Start by generating a UTM URL with Google’s Campaign URL Builder.
- Open the UTM URL in a private-browser mode (Incognito mode) as to simulate a new visitor.
- On the website page where you have embedded the Calendly Widget, start selecting an Appointment slot.
- Submit the Calendly form.
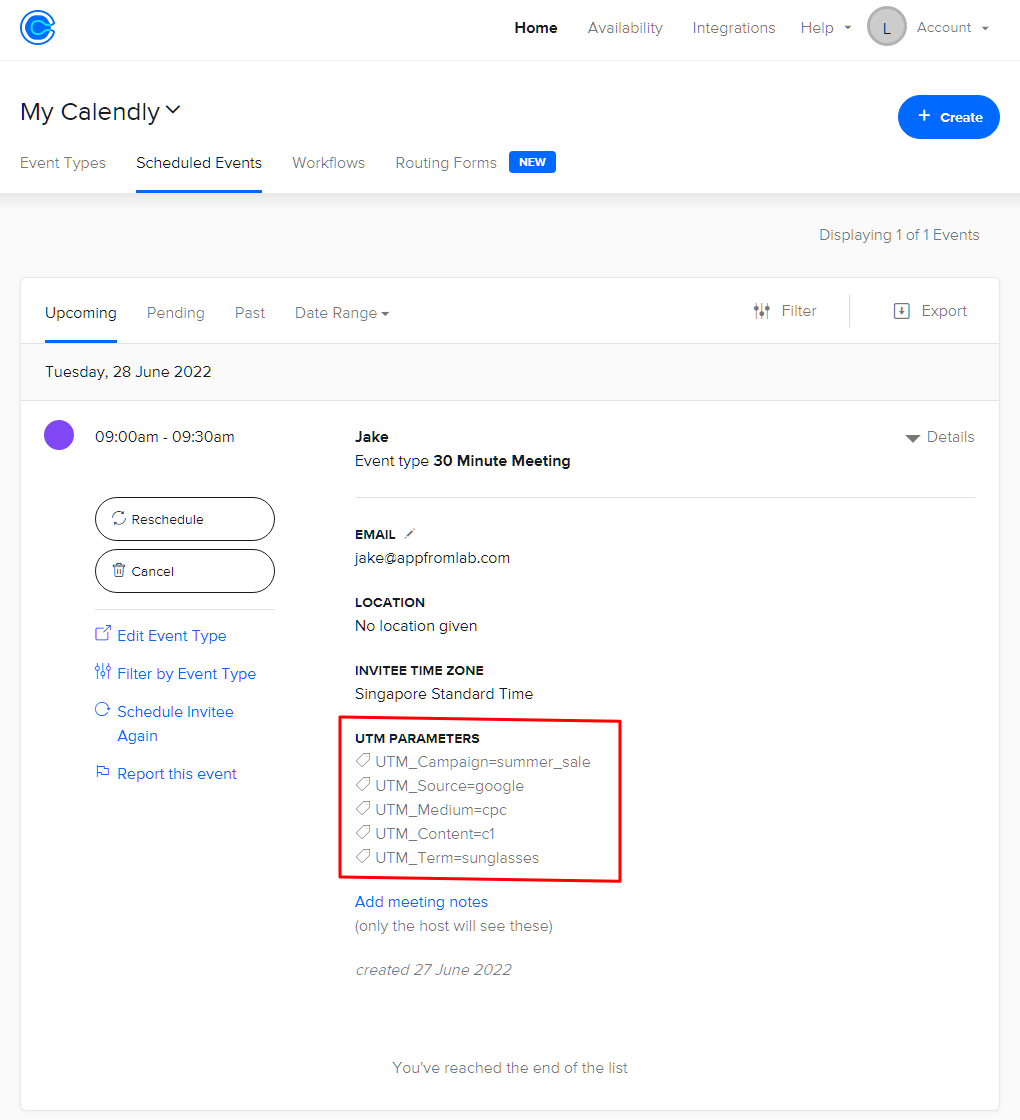
- Sign-in to your Calendly.com > under Scheduled Events > Upcoming Events > click on the entry which you have submitted.
- Under the UTM PARAMETERS section, you will see the respective UTMs (utm_source, utm_medium, utm_campaign, utm_content, utm_term).